Esportazione/importazione di CSV
CSV export/import is used for the following tasks:
- Mass manipulation - adding devices, groups jobs and template instances
- Mass manipulation - updating devices and jobs (thresholds, names, intervals, job parameters)
- Mass manipulation - deleting jobs
- Template functionality
- Detailed inventory including thresholds
CSV export/import only considers two group levels above a device. Devices and jobs in deeper tree structures will be exported only with two groups above.
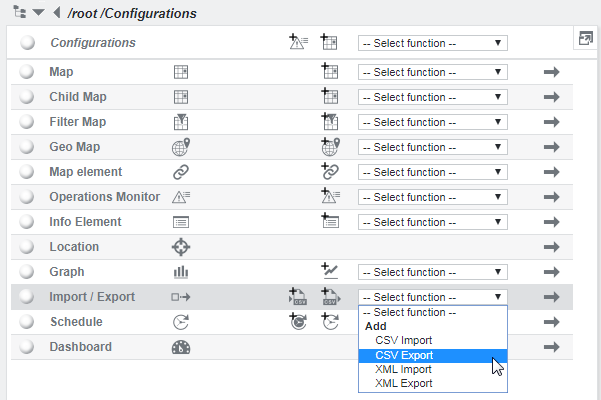
To use the export function, navigate to /root/Configurations, and select the appropriate function from the menu or click the CSV export icon:
Import and export are run as the user who initiates the action or edits the scheduler object (export only). When importing a CSV file, it must have the same format as when it was created by the export function.
Each column has a tag (in uppercase letters) in the header line to identify the type of the column. The tags outlined in the next section are defined.
CSV - group tags
| Tag | Description |
|---|---|
| GROUP_NAME_1 | Group name below import/export parent |
| GROUP_NAME_2 | Group name below GROUP_NAME_1 (above devices) |
CSV - device tags
| Tag | Description |
|---|---|
| DEVICE_NAME | Name of the device. This tag should not be empty for add/update operation |
| DEVICE_TYPE | Type of the device. Possible keys: firewall, firewall_pix, gateway, host, ids_ips, interface, other, proxy, printer, router, server, ssl, switch, vpn, wlan |
| DEVICE_ADDRESS | DNS name or IP address of the device |
| DEVICE_SUBNET_MASK | Subnet mask of the device |
CSV - job tags
| Tag | Description |
|---|---|
| JOB_NAME | Name of the job. This tag should not be empty for add/update operation |
| JOB_TYPE | Type of the job. This item cannot be changed. Possible keys for add operation: dhcp, remote_disk, dns, dns_query, fetchfile, http, ping, imap, remote_nwinterface, parsefile, pop3, remote_process, shell, smtp, snmp, sql, tcp, buslay |
| JOB_AGENT | Login name of the collector that will execute the job |
| JOB_INTERVAL | Interval in seconds. Possible values: 5, 10, 20, 30, 40, 50, 60 (1 minute), 120 (2 minutes), 180 (3 minutes), 240 (4 minutes), 300 (5 minutes), 360 (6 minutes), 600 (10 minutes), 1800 (30 minutes), 3600 (1 hour), 7200 (2 hours), 21600 (6 hours), 43200 (12 hours), 86400 (1 day), 604800 (7 days) |
| JOB_EXECUTION | Possible values: started, stopped |
| JOB_PARAMETERS | String containing all necessary parameters to run a job. Please note that \r must be encoded as $!r!$ and \n as $!n!$. Example for ICMP job: interval_mode=0&packets=10&bytes=56&icmpid_random=0 |
| JOB_ALARM_LIMITS | Alarm limit string. Example for ICMP job: WarningCond=Or&Warning1=error_code;<>;0;1;&MajorCond=Or&Major1=packetloss;%3d;100;1; |
CSV - PID tags
There are various PID tags which contain properties and custom properties assigned to objects. These columns are created if Standard or Full content is specified with the export.
Example: PID Serial No
CSV - other tags
| Tag | Description |
|---|---|
| TEMPLATE_NAME | Name of template that a device or job instance is linked to |
| TYPE | Type of object (group, device, job), cannot be changed |
| ID | Object id for update/delete operation |
| COMMAND | Possible values: ignore: Row is ignored (as if deleted from csv file) use: If not add/update, use as parent to add below (necessary for jobs and templates) add: Add object (for jobs: a device must be defined with command add, use or update) update: Update configuration (job types cannot be changed) delete: Only jobs can be deleted |
CSV - export
To create an export object, navigate to /root/Configurations and select Add CSV Export:
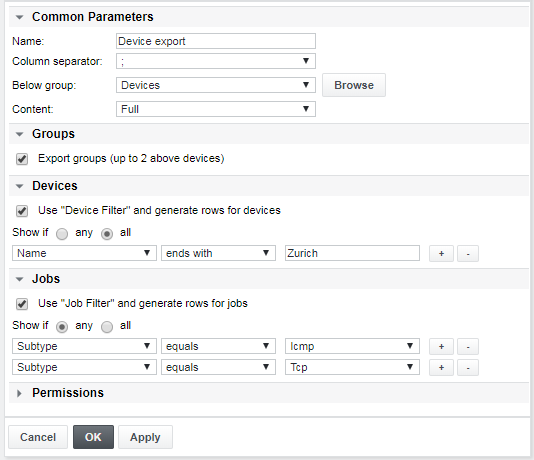
Configuration example:
| Property | Description |
|---|---|
| Name | Name of the export configuration |
| Column separator | Choose one of , ; | : or tab |
| Below group | Entry point of the object tree. Objects below this group are exported. Browse to the group containing the devices to export |
| Content | Allows selecting the amount of data to be exported. The tags GROUP_NAME_1 and GROUP_NAME_2 are only exported if groups are selected in the configuration. The device tags are only exported if devices are selected. The job tags are only exported if jobs are selected. If only jobs are exported, the tag DEVICE_NAME is added for information purposes. Basic: consists of: GROUP_NAME_1, GROUP_NAME_2, DEVICE_NAME, DEVICE_TYPE, DEVICE_ADDRESS, JOB_NAME, JOB_TYPE, JOB_AGENT, JOB_INTERVAL, JOB_EXECUTION, JOB_PARAMETERS, JOB_ALARM_LIMITS, TEMPLATE_NAME, TYPE, ID, COMMAND Full: consists of basic contents and DEVICE_SUBNET_MASK, DEVICE_SYSLOG_SOURCE, DEVICE_SYSLOG_LEVEL, DEVICE_WEB_LINK, DEVICE_REMOTE_ACCESS, plus all PID tags |
| Groups | By clicking this box, the file will also contain the group name which contains the objects, as well as the group affiliated group name |
| Devices, Jobs | In this section the amount of entries in the CSV file can be reduced by defining a filter as indicated in the above example configuration |
To generate an export file, navigate to the new object, click Generate and hit the Generate button in the right panel:
After generation, open the CSV with Internet Explorer; Firefox, Excel or any Spreadsheet application, or save it locally. Change the parameters if desired or leave them as they are.
Sample output of a CSV export file:
CSV - import
Navigate to /root/Configurations and select Add CSV Import:
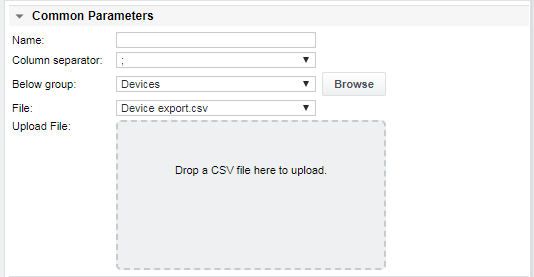
Configuration:
| Property | Description |
|---|---|
| Name | Name of the CSV import configuration |
| Column separator | Choose one of , ; | : or tab, depending on the separator used in the file to import |
| Below group | Entry point of the object tree to add objects below. For update, delete and use commands, the type and id in the CSV file is used and this configuration entry is ignored |
| File | The CSV file to import. Entries which are empty are cleared. Nonexistent entries are not modified for existing objects and are left empty for added objects |
| Upload File | Area to upload prepared CSV import files |
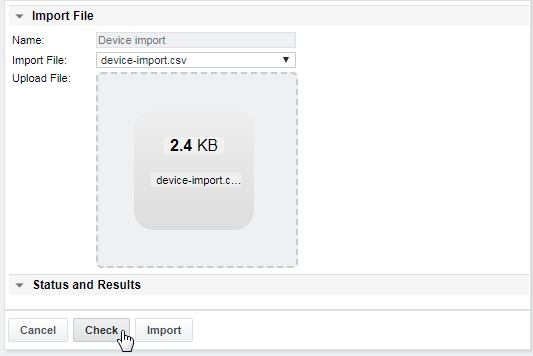
Before an import is started, a consistency check of the file is performed which may be initiated manually by pressing Check. A statistical overview is shown on the import page. The log file contains more information for each handled row.
CSV - import example
A previously exported CSV file can be used as a template for the import. New devices, jobs and device or job template instances can be added using the configuration shown below. After the export, all commands are by default set to ignore.
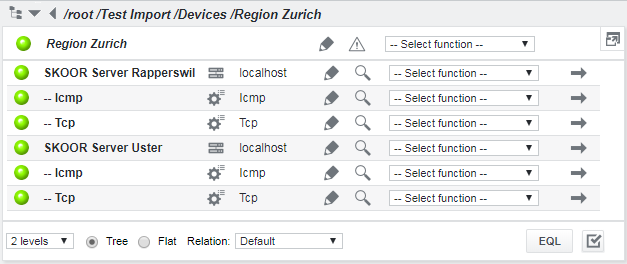
In the following example, two devices with two jobs each should be added below the the existing group Region Zurich below the Devices group. The ID column was left from the exported objects to identify the existing groups. The command column was changed from ignore to use for the groups and to add for the new devices and jobs:
Use any existing import object, or create a new one with Add CSV Import. The same import object can be used for different import tasks. Multiple import objects can be created for future automated import procedures.
Click Import to open the import configuration:
Drag & drop the prepared CSV to the Upload File area and click Check:
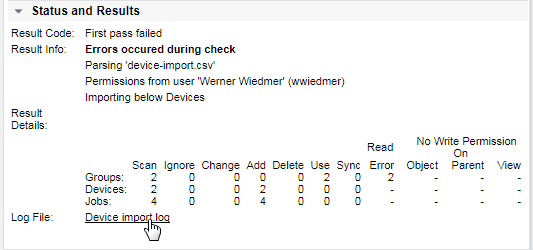
If the check fails, open the logfile provided below the Result Details section and correct the errors in the import file:
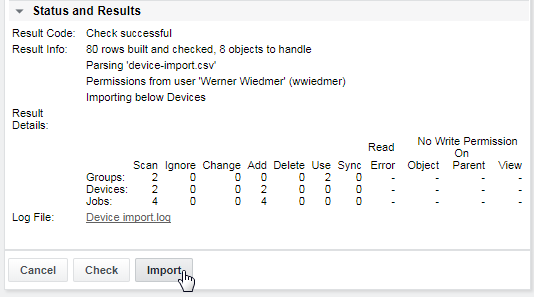
If the check was successful, verify the objects that are listed in the Result Details section and click Import:
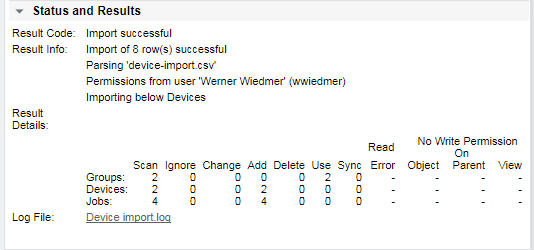
After the import is completed, the result details are displayed again:
The resulting objects should now appear below the selected entry tree path:
CSV - import with templates
When using CSV import, the source CSV file column TEMPLATE_NAME can be used to create instances of existing templates. Note the following about template imports:
- The column TEMPLATE_NAME is interpreted only if the command add is used for the respective row
- The import checks if exactly one top level template of the appropriate type exists, otherwise it indicates an error
- Templates are supported for groups, devices and jobs
- The new objects are created as instances from the template
- Groups and devices are added below the current parent
- Jobs are added below the current device (last added or defined by command “use”)
- It is not possible to add a group below a device
