SKOOR Dashboard Viewer Guide
Introduction
This guide covers the installation of the SKOOR Dashboard Viewer. For SKOOR Engine or Redhat installation, please consult the SKOOR Engine installation guide. For information on the architecture of the Dashboard components, please visit the Components page in the architecture section of this guide.
Prerequisites
SKOOR RPM repository is available
Hardware
Dashboard Viewer system
The Viewer service runs on a small machine. 2GB RAM and 2 CPU cores will be sufficient.
Dashboard Provider system
Usually, the Dashboard Provider service is installed on the SKOOR Engine server machine. If this machine was sized with some headroom, this component should run ok on the same system. Also, in most cases there is a Dashboards component installed already which has the same prerequisites.
Software
Dashboard Viewer system
The Dashboard Viewer requires apache httpd server together with mod_ssl. Please install the respective RPMs from the repositories and start the server:
$ sudo yum install httpd mod_ssl
$ sudo /sbin/service httpd start
Configure httpd to start up during system boot:
$ sudo systemctl enable httpd
Configure firewalld:
$ sudo firewall-cmd --add-port=443/tcp --permanent
$ sudo firewall-cmd --reload
Before installing the SKOOR components, SELINUX must be disabled:
# vi /etc/selinux/config
SELINUX=permissive

# setenforce 0
#
# sestatus
...
Current mode:                 permissive
...
Finally, the Dashboard Viewer needs a Dashboard Provider that feeds it with data from SKOOR Webservice.
Dashboard Provider system
The following SKOOR components need to be installed on the system where the Dashboard Provider will be installed:
Also, of course, an instance of SKOOR engine needs to be available.
Installation
Dashboard Viewer system
Install from SKOOR RPM repository using yum:
sudo yum install eranger-nodejs eranger-dashboard-viewer-service eranger-doc
To configure the Dashboard Viewer, open the file /etc/opt/eranger/eranger-dashboard-viewer-service.json.
Example:
{
  "port": 8092,
  "presharedKey": "1234567890",
  "logLevel": "debug",
  "defaultUsername": "dashboard-user",
  "defaultPassword": "dashboard-user"
}
Parameter | Description |
|---|---|
| The tcp port where the service can be reached locally by the web server |
| This key needs to be shared between the Dashboard Provider and the Dashboard Viewer service. This is for security reasons, so it should be changed to a unique value. |
| Set this parameter to any of the following values: debug, info, warn, error |
| Dashboards can be displayed with or without user login. A user and password must be set for the default dashboard. This should be configured with a SKOOR Engine readonly user. Please note that the same default user must be configured in all SKOOR Engines that provide data to this viewer. |
| Together with the defaultUsername, this password is used to authenticate the user configured with defaultUsername |
Check the status of the Dashboard Viewer by requesting the following URL using a browser:
https://<viewer server name>/skoor-dashboard-viewer-service/status
The output should look as follows:
{"status":"ok"}
Assuming the Dashboard Viewer should be reachable under its own dedicated FQDN, e.g. hostname.domain.com. Configure the redirection directly to the Dashboard Viewer main page, by adding the following lines into the apache ssl configuration file /etc/httpd/conf.d/ssl.conf (into the existing <VirtualHost *:443> block):
<VirtualHost *:443> #find this existing block in your ssl configuration file and add the lines below

    # Rewrite only / without anything else to /skoor-dashboard-viewer/
    RewriteEngine On
    RewriteRule ^/$ https://%{SERVER_NAME}/skoor-dashboard-viewer/ [R,L]
For this configuration to work, the DocumentRoot directory must exist. Create it, then restart the webserver, by using the following commands:
$ sudo mkdir -p /srv/eranger/html
$ sudo systemctl restart httpd
Dashboard Provider system
Install the nodejs and dashboard-viewer-provider package:
$ sudo yum install eranger-dashboard-viewer-provider
Configure the Dashboard Viewer Provider by modifying the file /etc/opt/eranger/eranger-dashboard-viewer-provider.json. Here a short description of the available properties:
Parameter | Description |
|---|---|
| Select one of the following levels: debug, info, warn, error |
| The web service to get data from |
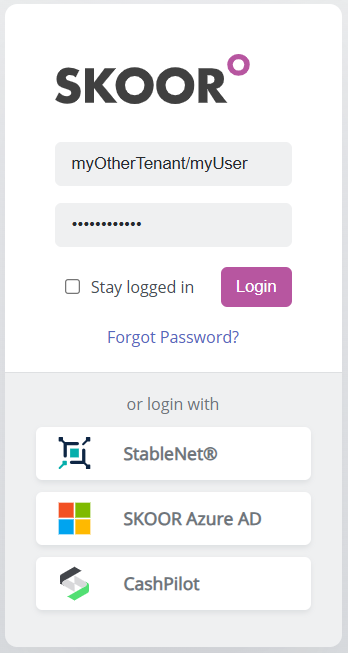
| Identifies different tenants if more than one feed the same dasboard viewer. The preconfigured value is "default". Login to the "default" tenand does not require a tenandId prefix. Other tenants can be logged in to by adding “<tenantname>/” before the username |
| This parameter is used to configure one or more viewers with a name, its url and presharedKey.
|
| This key needs to be shared between the Dashboard Provider and the Dashboard Viewer service. This is for security reasons, so it should be changed to a unique value. |
Example:
{
  "logLevel": "debug",
  "webserviceUrl": "http://localhost:8090",
  "authUrl": "http://localhost:8094",
  "tenantId": "default",
  "viewerServices": {
    "dashboard-viewer": {
      "url": "https://<viewer server name or ip>/skoor-dashboard-viewer-service",
      "presharedKey": "1234567890"
    }
  }
}
Restart the Provider Service now:
sudo systemctl restart eranger-dashboard-viewer-provider.service
Update
Update any SKOOR package by using yum update:
$ sudo yum update eranger-dashboards-*.rpm
Smoke test
Open the URL https://<viewer server name>/skoor-dashboard-viewer in a web browser. A dashboard visible to the configured default user should be displayed without the need to log in first. If available, one may switch to a different tenant by adding the URL parameter tenantId to the URL: https://<viewer server name>/skoor-dashboard-viewer?tenantId=someTenant
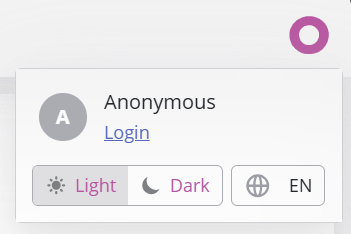
In the user menu, the Log In link allows logging in with a different user, typically one that allows to display privileged information that should not be visible to the default user:
Click Login and provide the credentials, optionally with a different tenant before the login name:
Private dashboards should now be visible.

