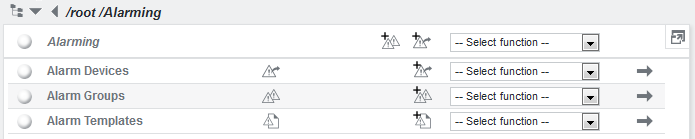
Add alarm device/group
To add an alarm device or group, go to /root/Alarming and create a new item by clicking one of the icons to the left of the dropdown list:
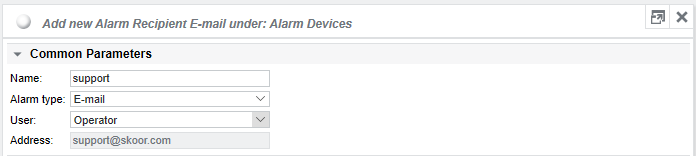
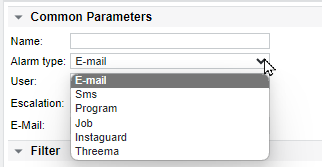
Give the alarm device a name, select the type and enter the additional parameters, depending on the type.
Alarm types
Type | Description |
|---|---|
The recipient’s email address can either be entered manually or an existing SKOOR Engine user can be selected from the User dropdown menu. More than one email address can be configured as comma separated list | |
Sms | SMS has to be configured with an individual third party service |
Program | Execute a script or program on the SKOOR Engine host |
Job | Execute a SKOOR Engine job |
Instaguard | Send alarms to Swissphone, a critical incident management service. Various channels, such as the s.GUARD app, voice calls, SMS and email can be used to receive and confirm alarms |
Threema | Send alarms to Threema Work, an enterprise messenger solution. Alarms can be confirmed |
Users and user groups
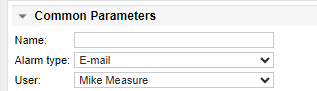
From the User dropdown, users with an email address or phone number as well as user groups can be selected. If user information gets updated, the alarm device will also be updated accordingly. Furthermore, complete user groups can be configured to distribute alarm notifications.
Alarm distribution with user groups
When a group is selected, an additional setting is provided to specify how alarms are distributed among the members of the group.

Various alteration methods can be configured, such as routing each new alarm to the next user in the group, defining intervals or alarm quantity thresholds (or a combination of both). Additionally, alterations can be scheduled for specific times. Lastly, there's the escalation option, which, when selected, means that no alarm alterations will be applied.
Alarm escalation
With escalation, after an alarm was sent to a recipient, it will be sent to another recipient, if the first one did not assign it in the time configured as delay (see filter section / delay).
Filter
The Filter section allows various settings.
Vacation
The on vacation checkbox which disables alarms for this alarm device. If checked on an alarm group, no child alarm links will be activated through this link. During vacation the state of the alarm recipient is Maintenance OK which indicates that it’s not active. As SKOOR Engine is not a vacation planning tool, only one vacation can be set. The purpose of the from/to fields is to set the vacation in advance, so one does not have to remember resetting it after returning from vacation.
The on vacation setting will be overwritten by a vacation set on user level, if this alarm device is linked to a SKOOR user.
Changes to the on vacation setting on alarm devices will not overwrite the vacation on user level

Notification configuration
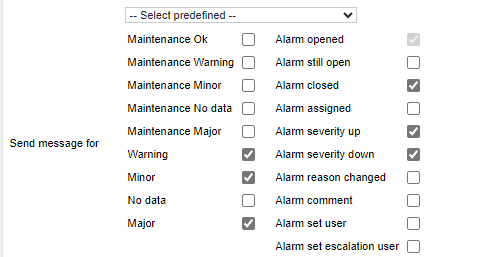
Select the alarming events to be notified of. A message is sent if a linked object enters the checked state. As a configuration shortcut, try the predefined configurations from the dropdown menu.
Delay
With the Delay messages field, one can specify a time to wait before alarms are sent. Delays can be configured only for new alarms (Open) or alarms changing to a worse state (Open and severity up). Open and severity up is used in cases where alarms of state Warning or Minor should not be sent to the alarm device. If the state changes to a worse state later on, no delay would be applied to the alarm.
Using a delay with a longer value than the measurement cycle prevents flapping alarms to be sent. In this example, a job with a 5 minute interval has to fail twice before a message is generated. If an alarm is closed within 6 minutes, No alarm message will be generated.
Additionally, one can define minimum and maximum values of sent messages per timeframe.
Example for an Alarm device of type Job: A job is configured to restart a failed Windows service. When setting the Send max parameter to a value of 3, it only does 3 retries and then stops. When it fails the 4th time, one would like to be informed by e-mail. So, set up another alarm of type E-mail and set the Suppress first field to 3. The 4th fail will now send a message instead of doing a restart. This will advert to the sent messages, not to the count an object fails.

Active time
Any kind of events will be sent during the configured Active time only. This also means that if an alarm closes outside this time, there will be no notification. At the other hand, if an object turns into a bad state outside the Active time, an alarm will be sent out at the time the Active time starts again if the bad state persists.
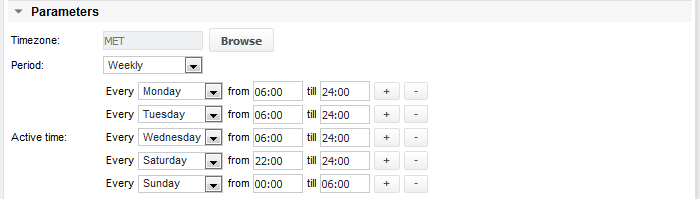
Under Parameters define the Active time of the alarm device/group. Choose either the period Daily for equal settings on each day, or define the days individually (Weekly).

If the period is set to Weekly, use the + to add more lines. Please note, that it isn’t possible to cross the day boundary. To define an active time from 22:00 - 06:00 on Saturday night, configure it as shown below:
Also, schedules can be used for defining active time.

Alarm repetition
Now, set the repetition interval. If set to default, it inherits the setting from the parent.
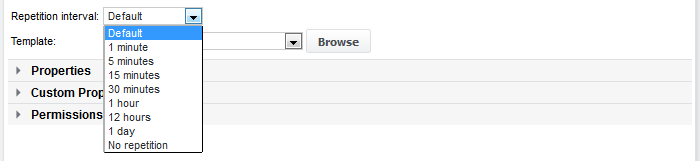
This setting will be ignored, if the Alarm still open from above had not been checked.
