Export/import XML
An XML interface is built into SKOOR Engine to allow export and import of any object structure with a single XML file from one SKOOR Engine system to another. This allows creating a specific structure on a SKOOR Engine test environment, export it and then import it to your SKOOR Engine production environment once the structure was successfully set up. The XML interface also allows you to synchronize SKOOR Engine with any third party tools (e.g. CMDB, other existing monitoring tools).
General information
When dealing with XML import/export, every object has a unique ID, the so called TID (Third party ID)
A TID identifies a SKOOR Engine object globally (over any SKOOR Engine instances)
If a TID has to be stored in consequence of an identity locking, the TID is getting stored as a Property called tid (please refer to import modes in the following section XML - import)
Supported objects for XML-imports/-exports
ACLs (import only)
Alarm devices
Alarm groups
Alarm templates
Devices
Folders (in Templates)
Groups
Jobs
Filter maps
OPM
Process objects
Properties
Reports (PDF only)
Report schedulers
Schedules
SLCs
SLOs
Templates (please refer to section Templates regarding the XML export/import functionality for templates)
Users (import only)
User groups (import only)
Graphs like state history, value history or value history plus can not be handled by the XML import/export functionality and might lead to warnings in the export/import process
Interface definition:
XML import/export conforms to XML 1.0 standard
Supports all w3c XML post processing standards
XML - export
There are two ways to export objects in XML format.
One time export
The first and fastest way is to open the function menu of a group and click XML Export:
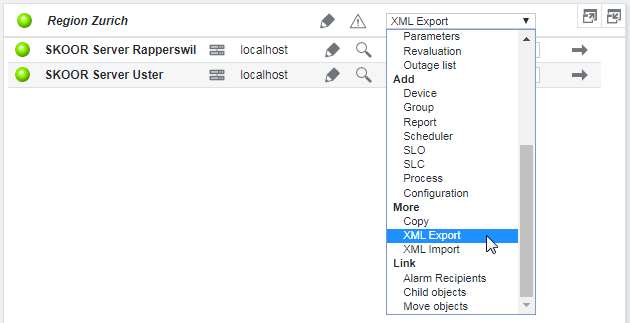
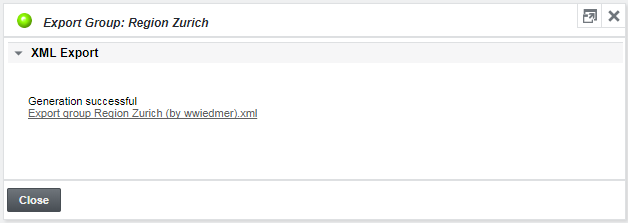
This action will immediately export the objects below this group:
Export configuration
The second way is to create an object of type XML export under /root/Configurations:
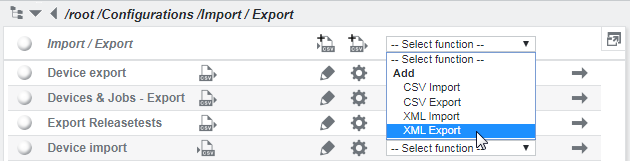
XML Export configuration:

Property | Description |
|---|---|
Name | Export configuration name |
Export | The path below which objects should be exported |
Postprocessor | This feature is currently not used |
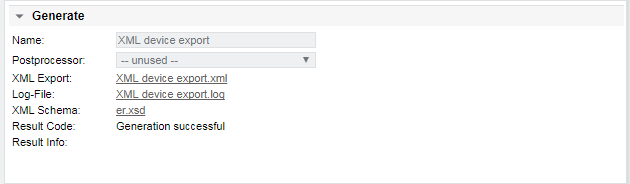
The object will be created under the /root/Configurations/Import / Export node. To actually initiate the export and create the XML file, navigate to /root/Configurations/Import / Export and click Generate on the previously created object:

Press the Generate button:
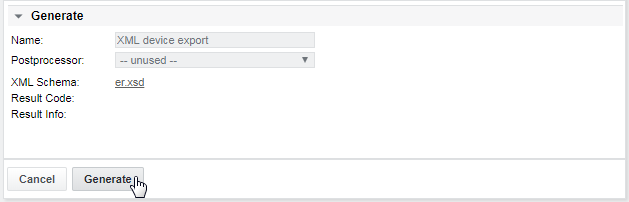
The XML export file will appear and can be downloaded via the browser:
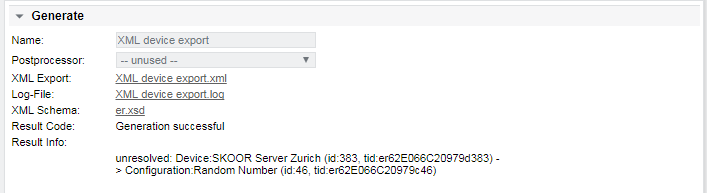
Messages with unresolved links as shown in the following Result Info section can be caused by objects like graphs that are not supported by the XML Export feature. Other objects should not be affected by this:
Property references in objects such as <$PID18$> that may be used within text fields are ignored
XML - import
Several import modes are available:
Import mode | Description |
|---|---|
Add |
|
Update | The objects below the import group are updated with the ones defined by the XML file
|
Add/update XML top objects |
|
Scope free |
|
If objects are imported on the same system as they where exported before, the Add mode may lead to duplicated objects like alarm devices that are linked to exported objects
These import modes are listed in the respective dropdown with the title Instance in order to separate them from the import modes to be used for templates only which are listed with the title Template
One time import
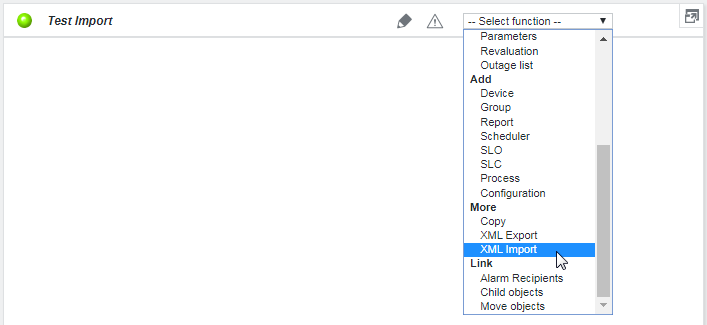
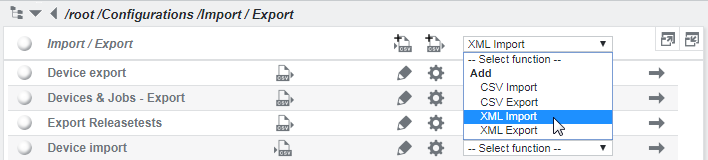
As with the XML export, imports can be performed directly on any group object. Click XML Import in the function menu of the group that should contain the objects after the import:
Upload and select a file to import and choose the required mode from the dropdown:
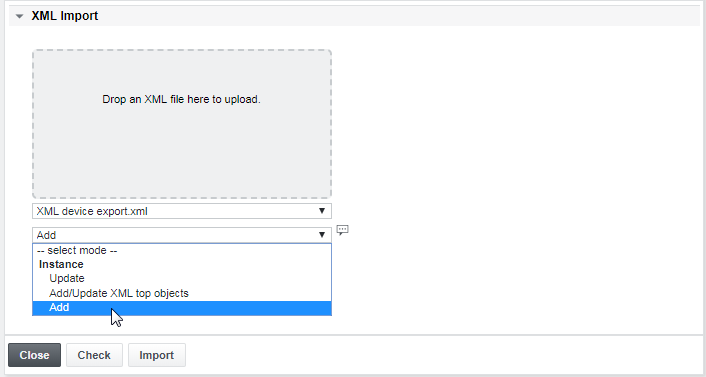
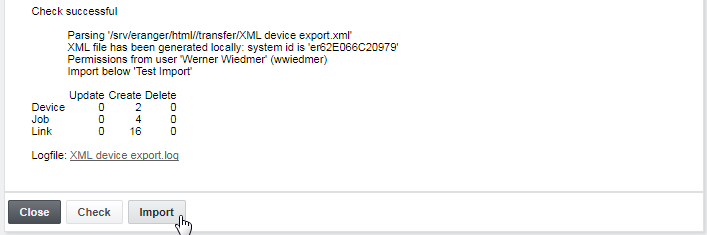
Click Check to verify the import file and correct any errors if necessary. Please consult the provided logfile to analyse errors. When the check was successful, click Import:
Import configuration
If a persistent import configuration is needed, it can be created under /root/Configurations/Import / Export:
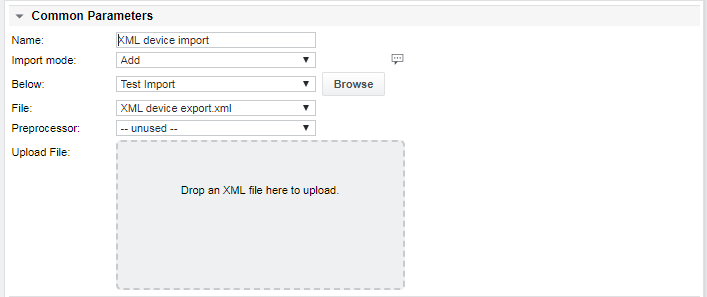
XML Import configuration:
Property | Description |
|---|---|
Name | Name of the XML Import configuration |
Import mode | Import mode (see description above) |
Below | Entry point of the object tree to add objects below |
File | XML file to be imported (must be uploaded first) |
Preprocessor | Currently not in use |
Upload File | Drag & Drop an XML file to upload the file to SKOOR Engine and select it from the File drop-down menu |
The import procedure is the same as described above. A successful import will show Import successful as Result code. A summary will be shown and written to the log file. By clicking on the log file, a new window appears with detailed information about the import.
Checking and finally importing an XML file can take an hour or even more, depending on the number of objects involved and the import mode chosen. Pressing the Import button will finally trigger the import. Only do this if the check was successful, as stated next to Result Code
The import checks first if any license limit will be violated. In this case the user gets an error message and the import will fail
If an error occurs during the import, all newly created objects are removed completely - no dangling objects will remain in the system
Edit the XML file before import
Typically, there is no need to change the exported file before importing it again. However, sometimes configuration changes can be faster if performed in the XML before the import.
Example: Change the collector of imported jobs
If multiple data collectors are configured, it might be necessary to change them while importing jobs from a different SKOOR system.
First, look for the Agents tag in the XML file (there can be multiple Agent tags inside it):
<Agents>
  <Agent id="xxxx">
    <Name>collector-local</Name>
  </Agent>
</Agents>
Then, add a new Agent tag with the following conventions:
Enter an Agent id that starts with an alphabetic character. This id is not related to any object in the SKOOR Engine, it is used only inside of the XML itself
In the Name tag, add the name of an existing collector in the target system
<Agents>
  <Agent id="xxxx">
    <Name>collector-local</Name>
  </Agent>
  <Agent id="myNewCollectorId">
    <Name>external-collector-1</Name>
  </Agent>
</Agents>
Now, the Agent id can be used to configure the new collector to all jobs in the Jobs tag. Set the Agent tag of the jobs accordingly:
<Jobs>
  ...
    <Name>My Job</Name>
    <Agent>myNewCollectorId</Agent>
  ...
</Jobs>