Users
The following steps are not intended for users managed in LDAP that are part of a corresponding user group in the SKOOR Engine. These users are created automatically at login time.
For users managed in the SKOOR Engine, select Add User in the Users dropdown menu or click the icon to the left of the menu:

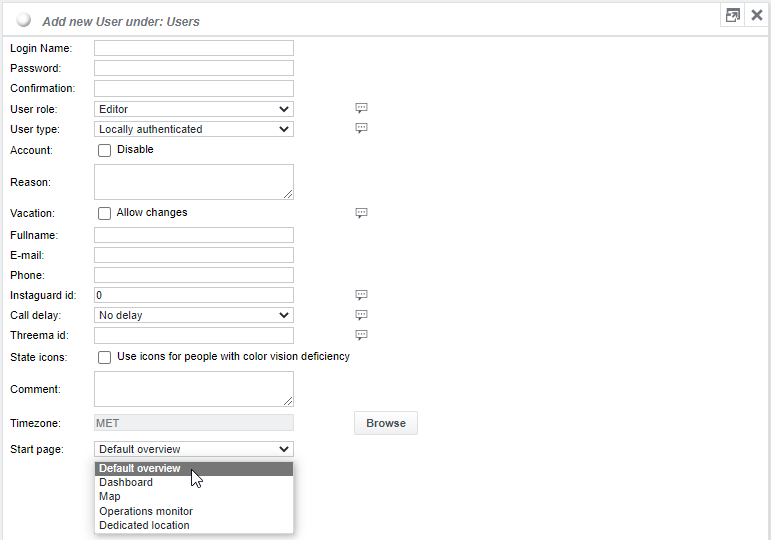
Configure the new user on the following screen:
Invite new users
New local users can be invited to the SKOOR system by configuring the user with no password and an email address. By the time the configuration is saved, the user gets an email with a link to login and set a password. The link is valid for 30 days.
In case the user does not respond to this invitation in time, it can be triggered again manually. This is available in the user edit mode with the button "send mail" or via the option menu "send invitation mail".
Settings
Setting | Description |
|---|---|
Login Name | Enter the login name Allowed special characters: “.”, “-”, “_”, “@” |
Password/Confirmation | Enter the password twice |
User role |
|
User type |
|
Account disable | Disable access for this user |
Reason | Text to display on the login screen if a disabled user trys to access the system |
Password | This option is available only when the user role is set to Read only or Operator. These users can only change their password if Allow changes is checked. Otherwise, an administrator user must change the password |
Vacation | If checked, the user will be able to set one vacation with start and end date. Vacations set on the user will overwrite vacation on alarm devices this user is linked to. If a vacation is changed or deleted afterwards on an alarm device, the vacation on the user remains unchanged |
Fullname | This string is displayed in the status line when the user is logged on |
The user’s e-mail address. This will be used by
| |
Phone | The user’s telephone number. This will be used by Alarm devices |
Instaguard Id | Personal id for s.GUARD alarming. See Instaguard alarm device for details |
Call delay | Configure a delay for voice alarms. See Instaguard alarm device for details |
Threema Id | Personal id of a Threema user. See Threema alarm device for details |
State icons | Enable the checkbox to use state icons that are more easily readable by people with color vision deficiency. This checkbox can not be changed if the edited user is LDAP managed. It then must be changed on user group level |
Comment | Free text comment |
Timezone | Each user can specify an individual time zone. Available zones can be browsed by clicking the Browse button |
BSM fullscreen | Show/hide header: This option allows to reduce the BSM fullscreen view additionally by removing the gray header. The header is enabled by default |
The Start page setting allows selecting the entry point after user login:
Start page setting | Description |
|---|---|
Default overview | Open configuration view with /root object after login |
Dashboard | Open a dashboard after login.
|
Map | Open a map after login. Select Last selected by user or a specific Map object from the dropdown list |
Operations monitor | Open the operations monitor after login. Select Last selected by user or a specific OPM configuration from the dropdown |
Dedicated location | Open SKOOR Engine at a specific location inside the object tree. A new dropdown appears with a Browse button to the right. Using this button, any location in the object tree can be selected. Click Next to make the chosen object available in the dropdown list and select it as start page for this user |
User configuration | For customized configurations only |
Click OK to add the user or OK add next to add the current user and add an additional user.
Configuration of externally managed users
Some SKOOR specific user settings can be changed even if the users are managed by an external system.
Click Change for managed user on the users function menu:
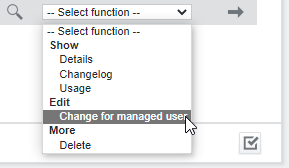
Settings like the email address, phone number, Instaguard Id or Threema id can be set this way.
If these settings are also provided by the external user management, they can be overwritten at the next user login